
Cisco Modeling Labs (CML) is the official replacement for VIRL, and running it on a VMware ESXi host is the sweet spot for a home lab or team lab: you deploy it once, snapshot it, and reach the web UI from any browser on your network. This guide walks through a clean install of CML 2.10 (build 2.10.0+build.13) on ESXi, from uploading the OVA to logging into the workbench and starting your first node. Every step below is a real screenshot from the install, not a stock diagram.
If you would rather watch it happen end to end, the full screen capture is near the end of this guide. The written version here is the one you will want open on a second monitor while you click through the wizard.
What you need before you start
CML ships as two downloads from your Cisco account: a controller OVA and a reference platform (refplat) ISO. The OVA is the appliance itself (an Ubuntu 24.04 controller). The refplat ISO carries the node images (IOSv, IOL-XE, NX-OS, ASAv, and so on) that your labs actually run. You need both.
These are the exact files used in this build, so you know what you are looking for in the download portal:
On the host side, here are the minimum requirements Cisco publishes for the CML VM. Treat these as a floor, not a target: the more cores and RAM you give it, the more nodes you can run at once.
Two things bite people here. First, CML uses nested virtualization (every node is itself a VM), so your processor must support VT-x and EPT, and some reference images only run on Intel. Second, the OVA's virtual hardware version is 13 for backwards compatibility, so plan to upgrade VM compatibility to the newest version your ESXi host supports (more on that below). Cisco officially requires ESXi 7.0+, so if you are on an older build, that is the first thing to address.
Step 1: Upload the refplat ISO to your datastore
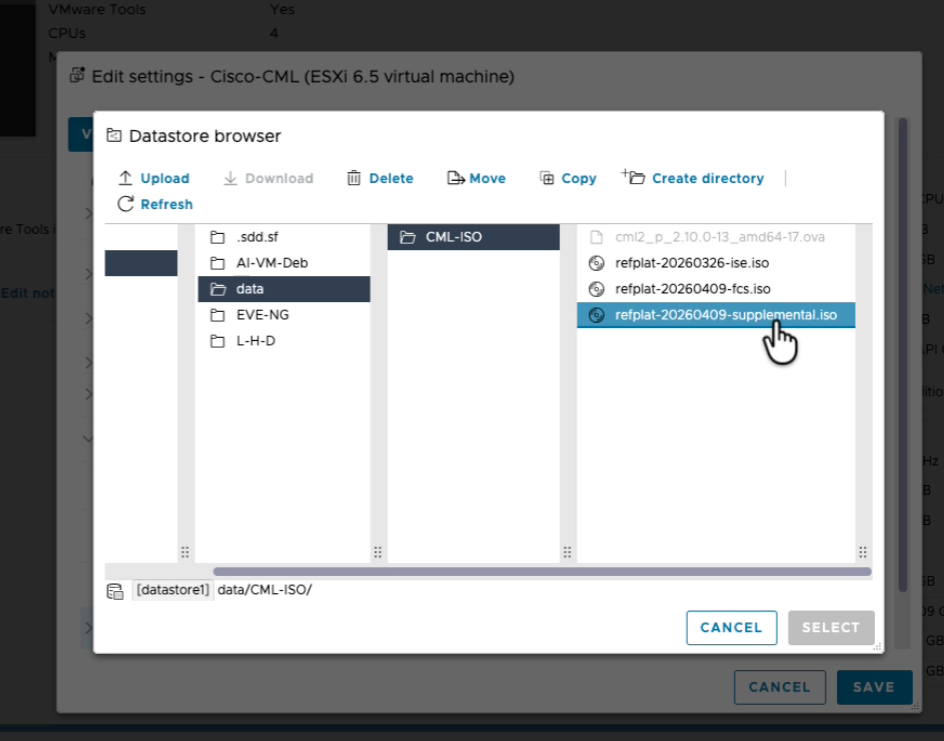
Before you deploy anything, get the refplat ISO onto a datastore that the ESXi host can see. In the ESXi Host Client, open the datastore browser, create a folder (this build uses data/CML-ISO/), and upload the refplat ISO files. You will attach one of them to the VM's CD/DVD drive in Step 3.
Step 2: Deploy the CML OVA
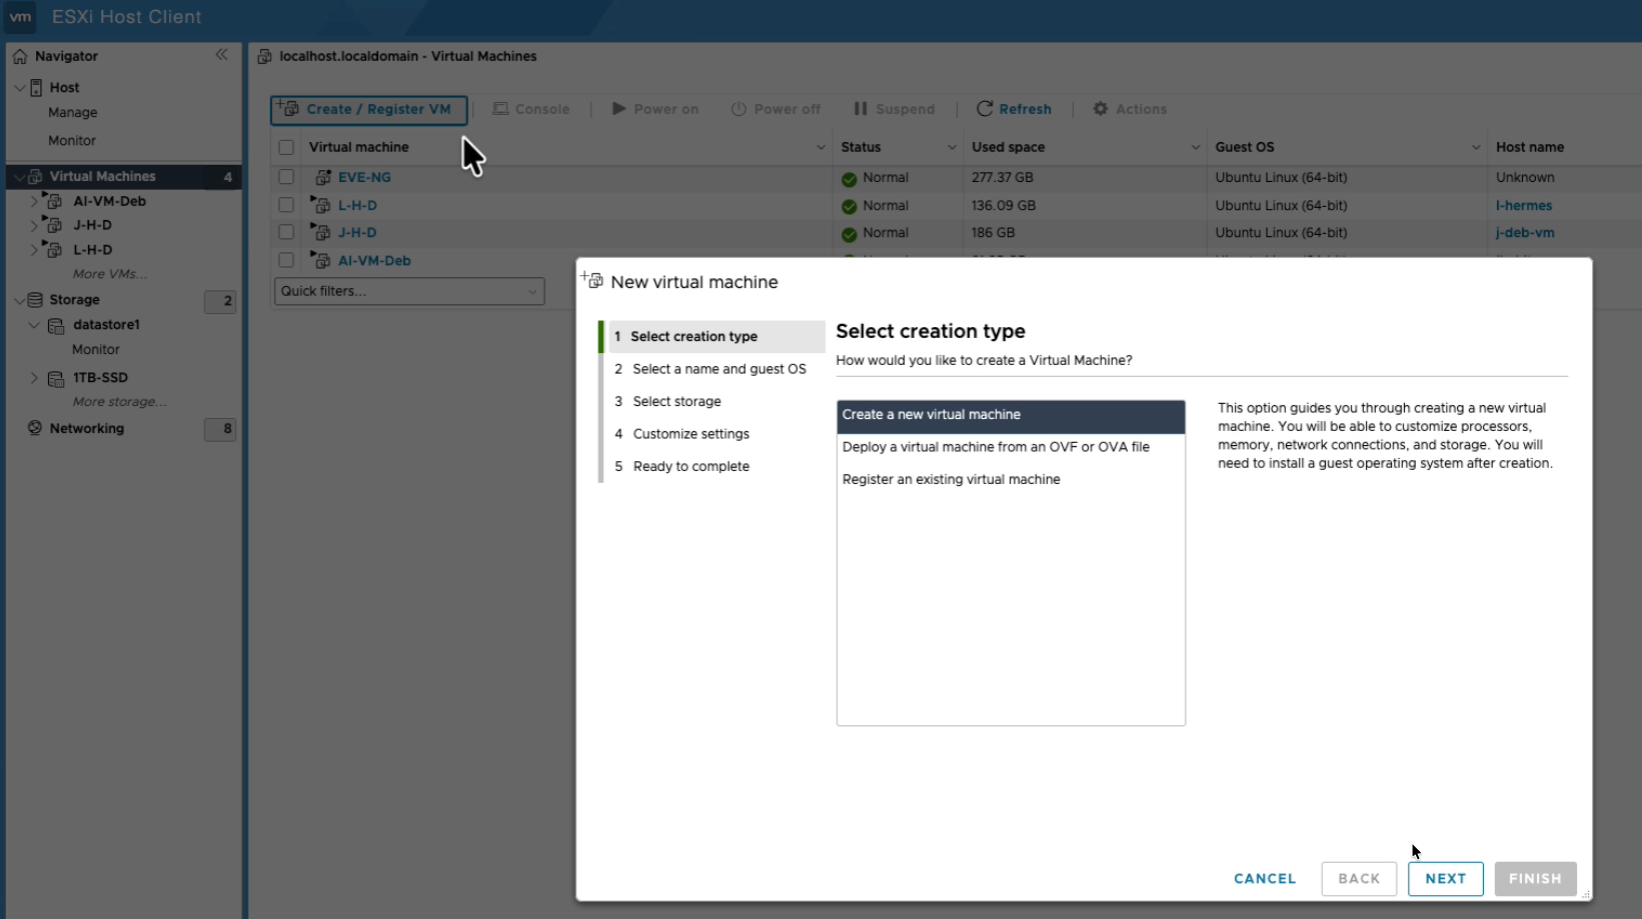
In the ESXi Host Client, go to Virtual Machines and click Create / Register VM. Choose Deploy a virtual machine from an OVF or OVA file.
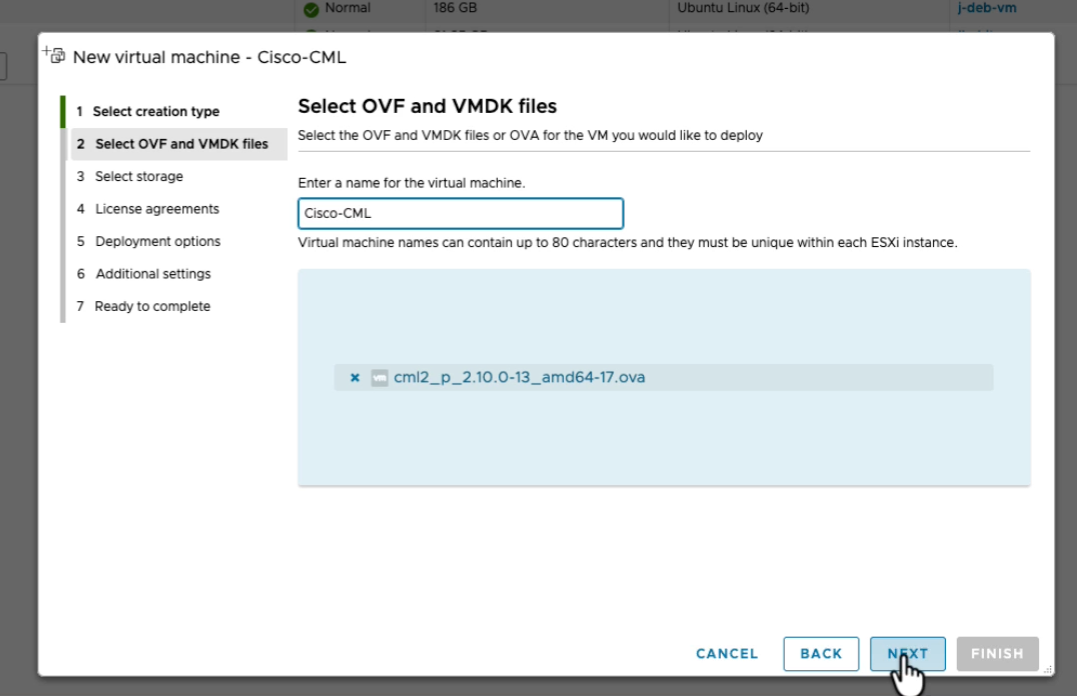
Give the VM a name (here it is Cisco-CML) and drop in the OVA file. The wizard accepts the single .ova directly, no need to unpack it.
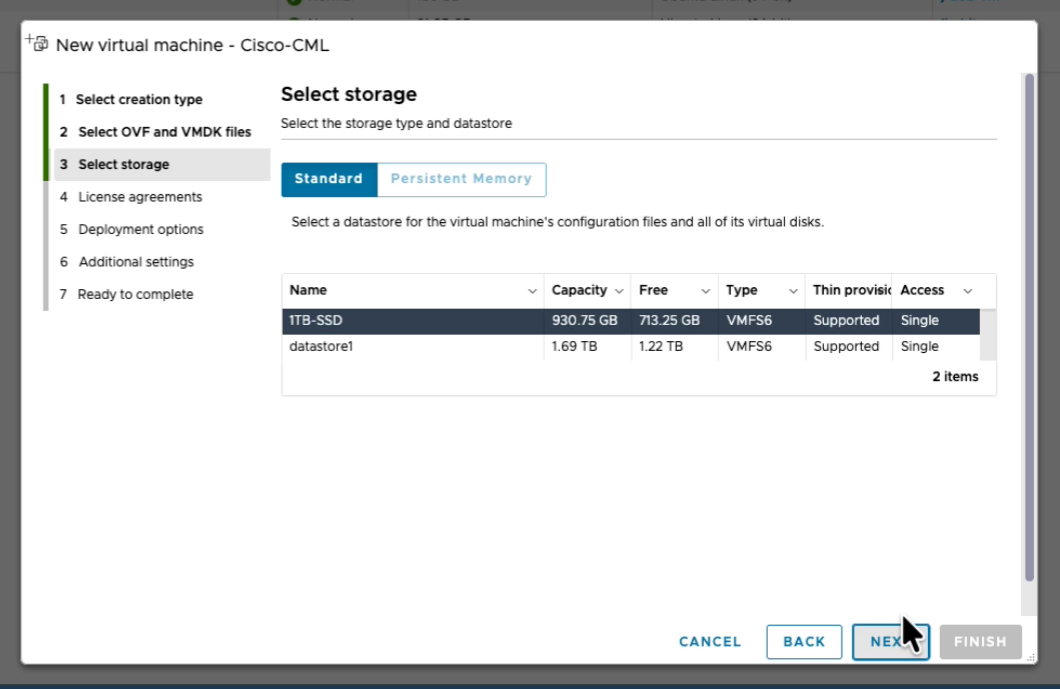
Pick a datastore for the VM. An SSD-backed datastore makes a real difference here, because labs start faster and write-sensitive nodes (NX-OS in particular) boot more reliably on fast storage.
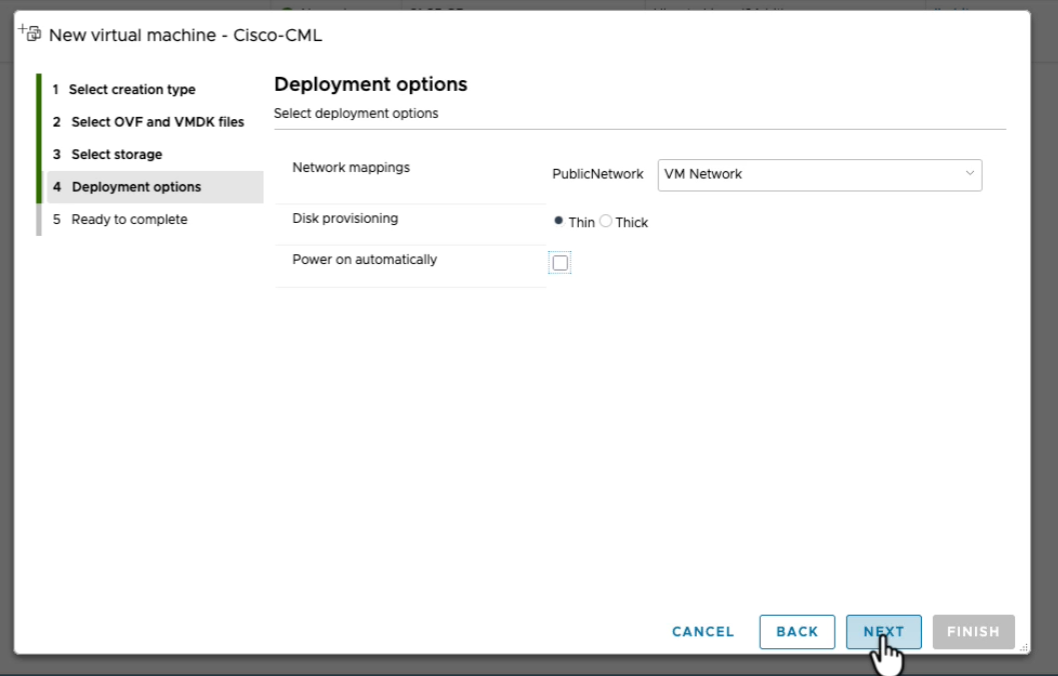
On the deployment options screen, map the network to a port group your browser can reach, choose Thin provisioning to save space, and leave Power on automatically unchecked. This part matters: you must configure the VM hardware before its first boot.
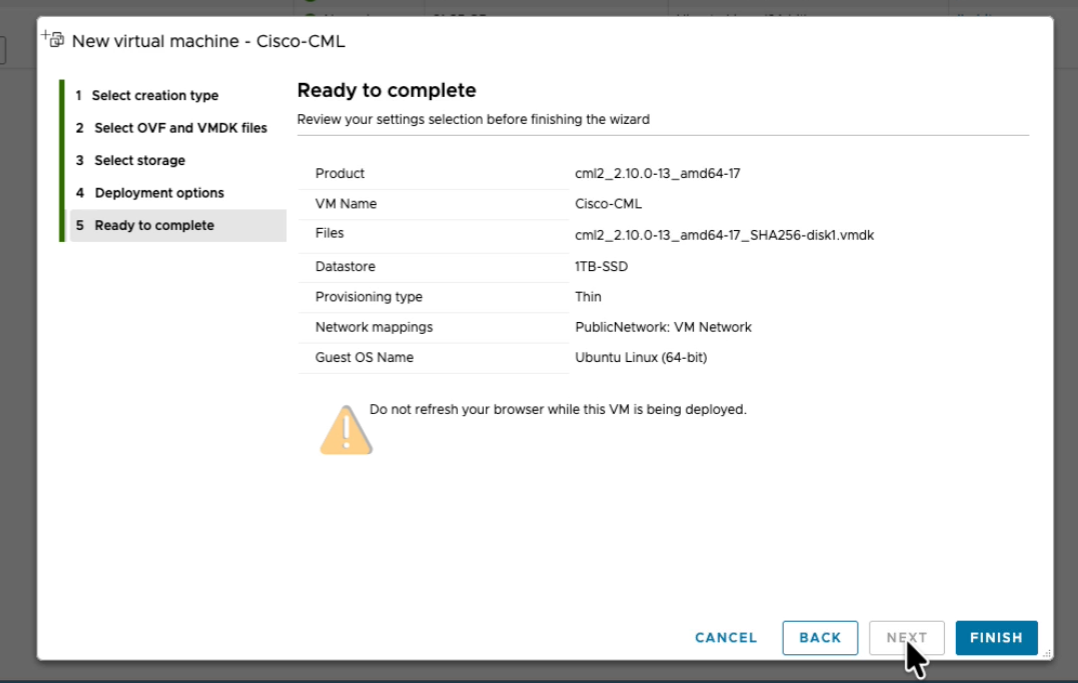
Review the summary and finish. The guest OS is Ubuntu Linux 64-bit, which is the CML controller's underlying OS.
Step 3: Configure the VM before first boot
This is the step most rushed installs skip, and it is the one that determines whether your lab is usable. With the VM still powered off, open Edit settings. The OVA's defaults (a handful of vCPUs, 8 GB RAM, a 32 GB disk) are the bare minimum and are not appropriate for a real ESXi deployment.
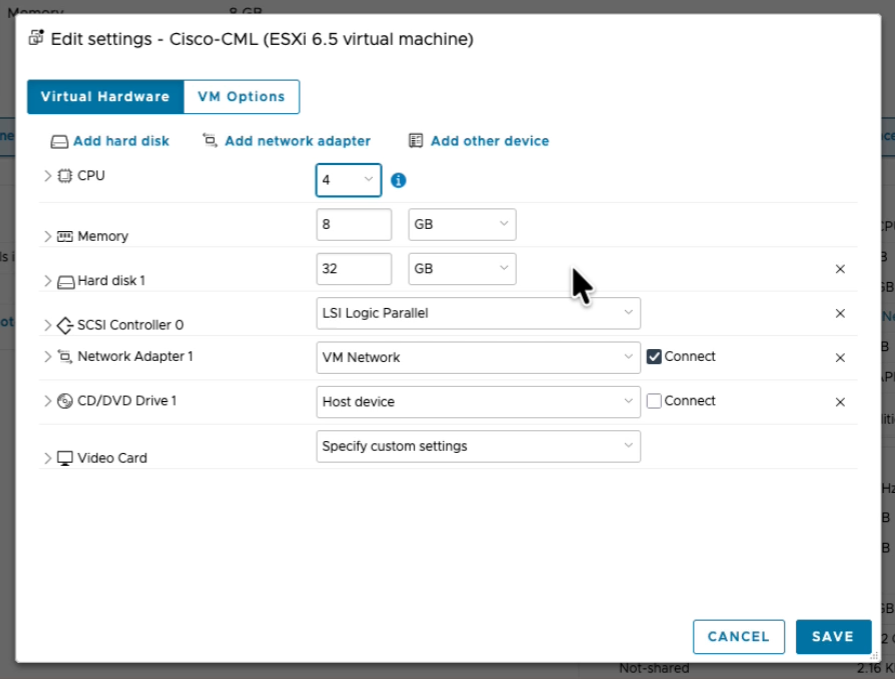
Here is what to set, and why each one matters:
There is one host-level change that catches almost everyone the first time they try to bridge a lab to the real network. For the CML VM's interface to pass lab traffic out to your LAN, the vSwitch and port group it uses must allow it. On each port group or vSwitch the CML VM touches, set Promiscuous Mode = Accept and Forged Transmits = Accept. On the host, set Net.ReversePathFwdCheckPromisc = 1 in Advanced System Settings. If you skip this, the controller UI still works, but bridged external connectors will silently drop traffic.
Step 4: First boot and the setup wizard
Now power on the VM. CML comes up through a GRUB menu and boots the CML2 entry automatically.
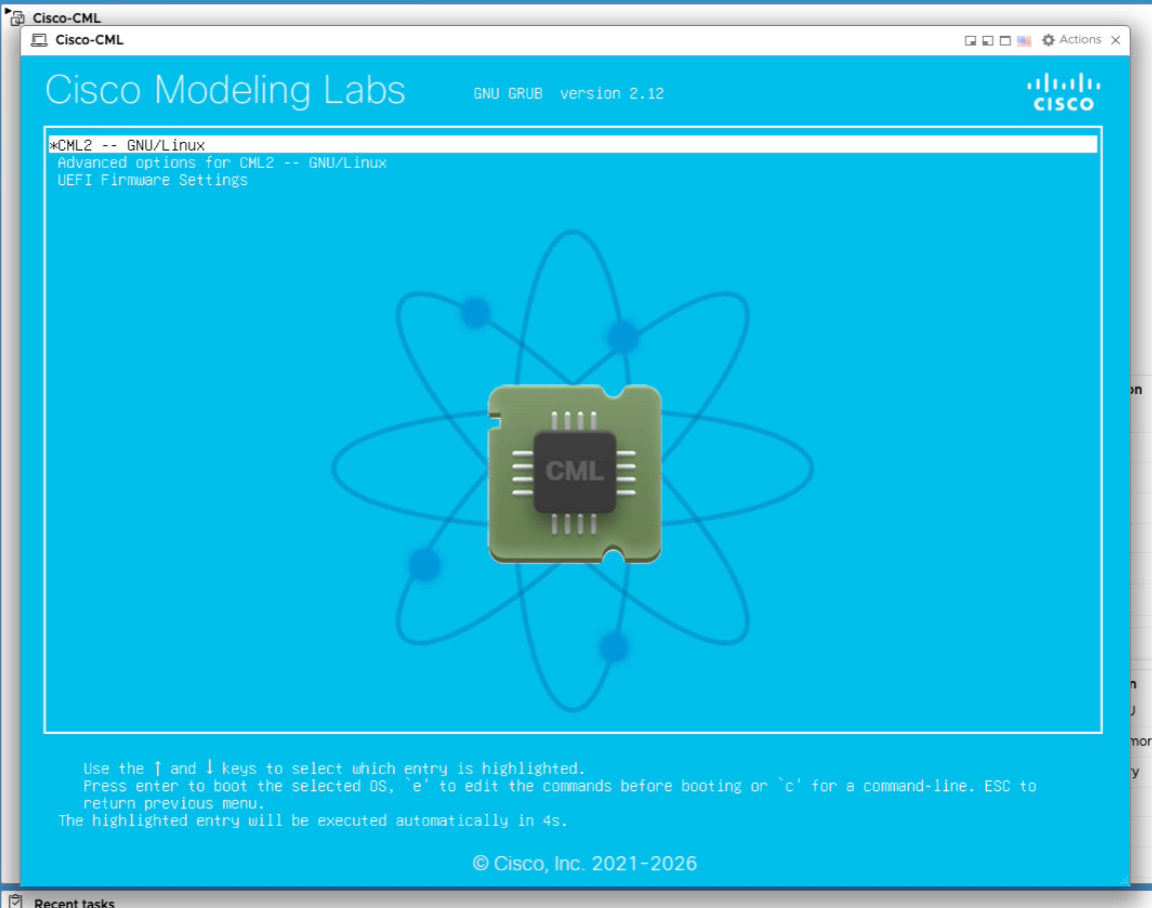
On first boot CML drops you into a text setup wizard that walks through the controller's identity and networking. First, the hostname:
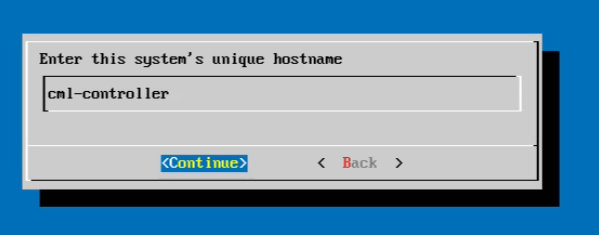
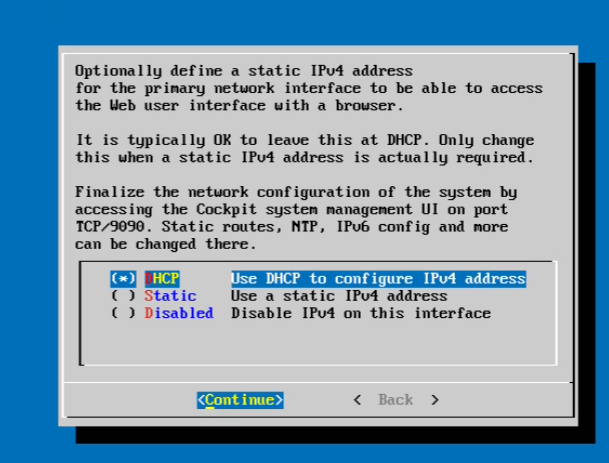
Next, the primary interface addressing. DHCP is fine for a first install and the easiest path to a working UI. You can pin a static address later from the Cockpit system management UI on TCP/9090, or switch to static here if your lab network expects it.
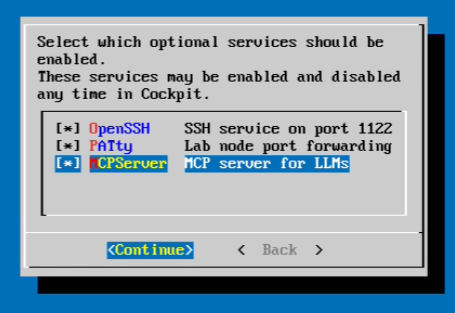
Then you choose optional services. CML 2.10 exposes three: OpenSSH (SSH to the controller on port 1122), PATty (port forwarding straight to lab nodes), and the new MCP server, which lets LLM tooling drive CML programmatically. Enable what you need; they can all be toggled later in Cockpit.
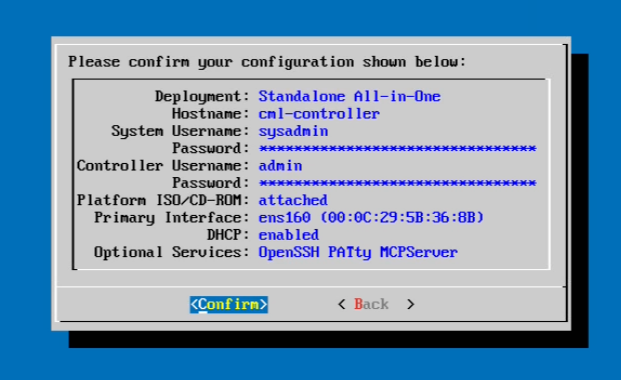
The wizard also has you set two passwords: one for the sysadmin system account (OS and Cockpit) and one for the admin CML account (the web UI). Keep them distinct and write them down. Finally, you confirm the whole configuration before it commits.
Once you confirm, CML copies the reference platform images off the ISO and onto its local disk. This is required from CML 2.3 onward; nodes run from local disk, not the mounted ISO. The wizard warns you it takes roughly ten minutes.
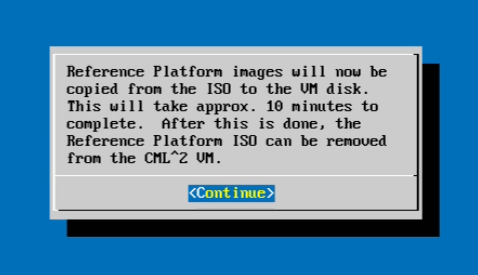
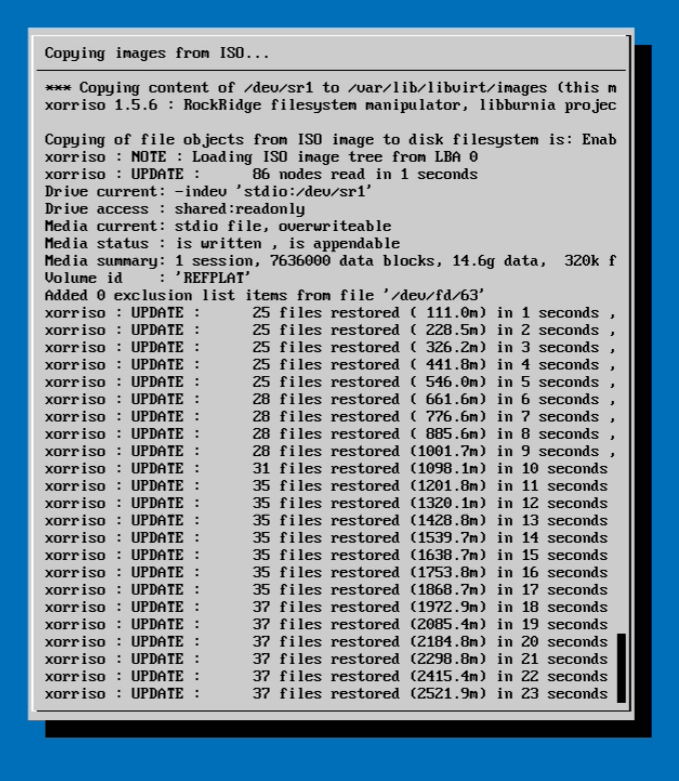
What is actually on the reference platform ISO
Once the copy finishes, those node images become the building blocks for every lab. If you mount the refplat volume directly, you will see a virl-base-images directory with one folder per image, and people often search for these exact folder names when they are hunting for a specific version. Here is what shipped on the 2026 reference platform used in this build, and what each one is good for:
iol-xe-17-18-02iol-xe-serial-4eth-17-18-02ioll2-xe-17-18-02iosv-159-3-m12iosvl2-2020csr1000v-17-03-08acat8000v-17-18-02cat9000v-uadp-17-18-02cat9000v-q200-17-18-02nxosv9300-10-6-2-fiosxrv9000-26-1-1xrd-26-1-1asav-9-24-1wireless-ap-24-04-20260409wireless-client-24-04-20260409alpine-wanem-3-23-3alpine-trex-3-23-3alpine-desktop-3-23-3alpine-base-3-23-3ubuntu-24-04-20260307server-tcl-17-0Step 5: Log in and verify the install
When setup completes, the VM console shows a login banner with the version (here, CML 2.10.0+build.13 on Ubuntu 24.04) and, most importantly, the URLs to reach the web UI and the Cockpit system console on port 9090.
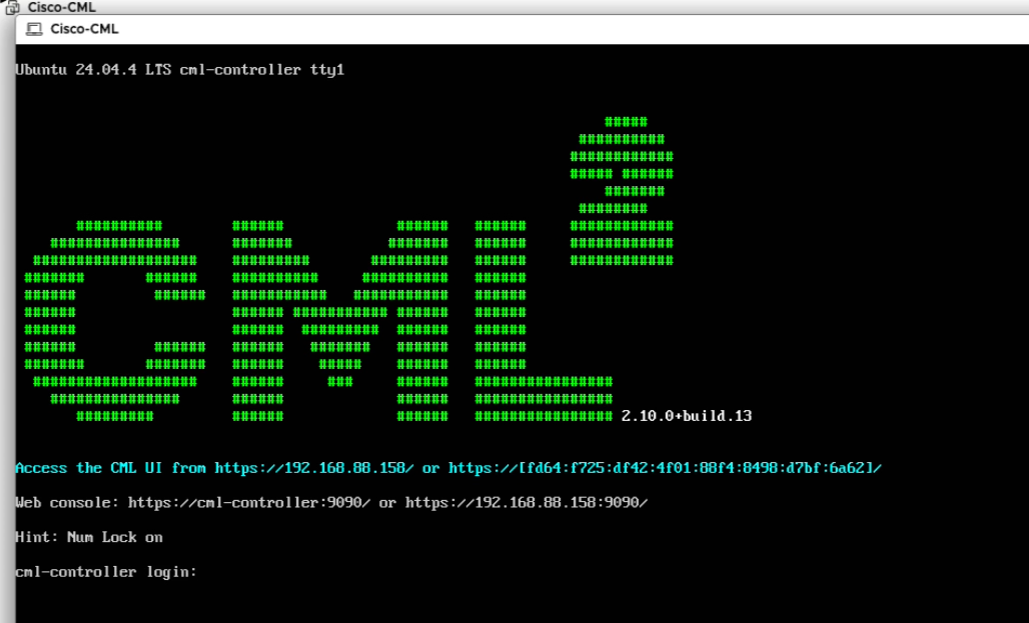
Browse to that address in Chrome or Firefox (CML's UI is HTML5 and is tested on the latest two versions of both) and you get the Cisco Modeling Labs login. Sign in with the admin account you created in the wizard.
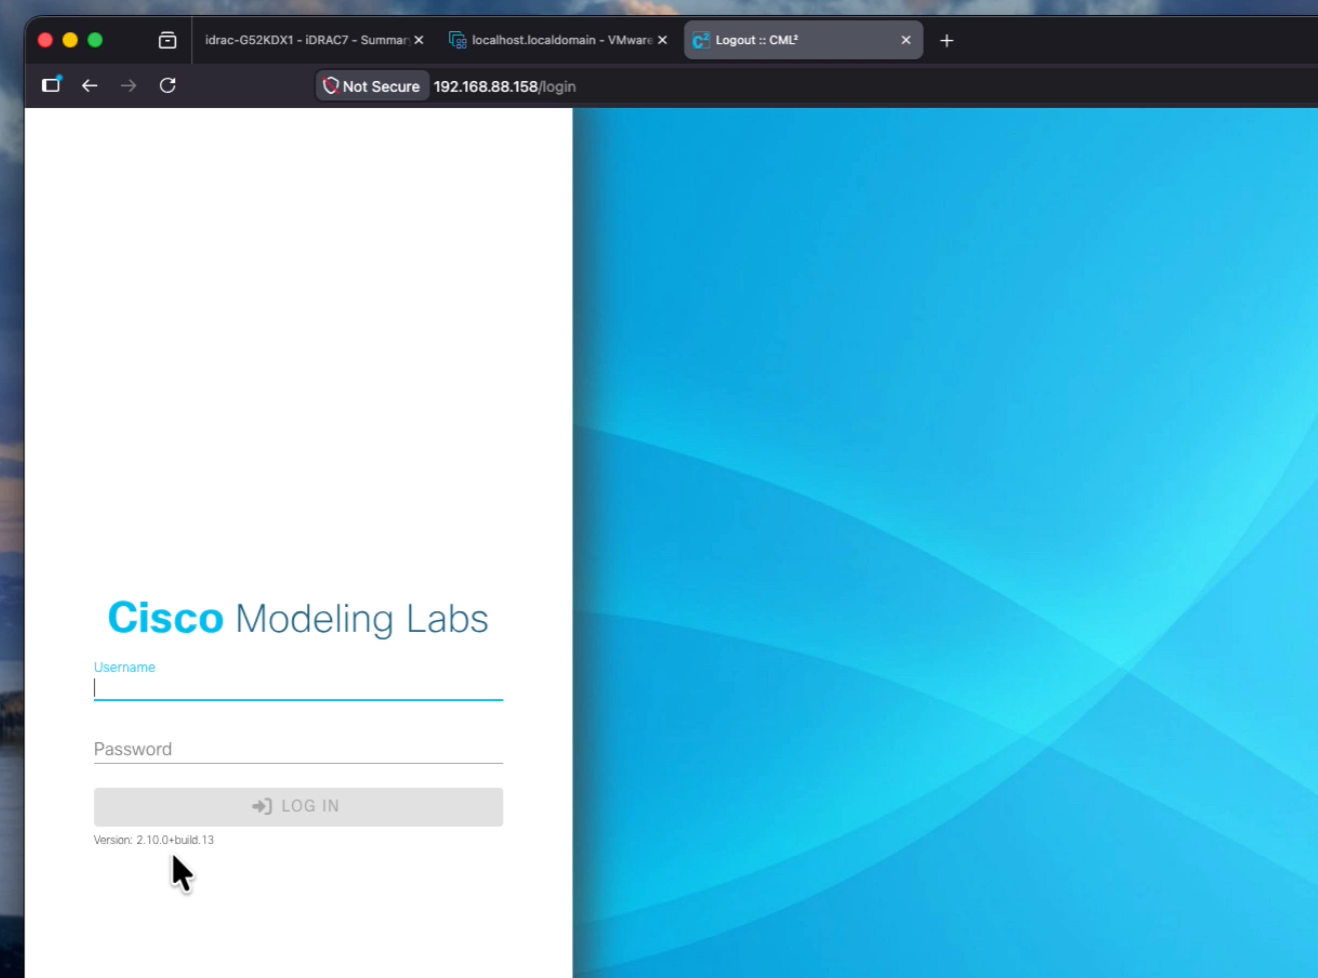
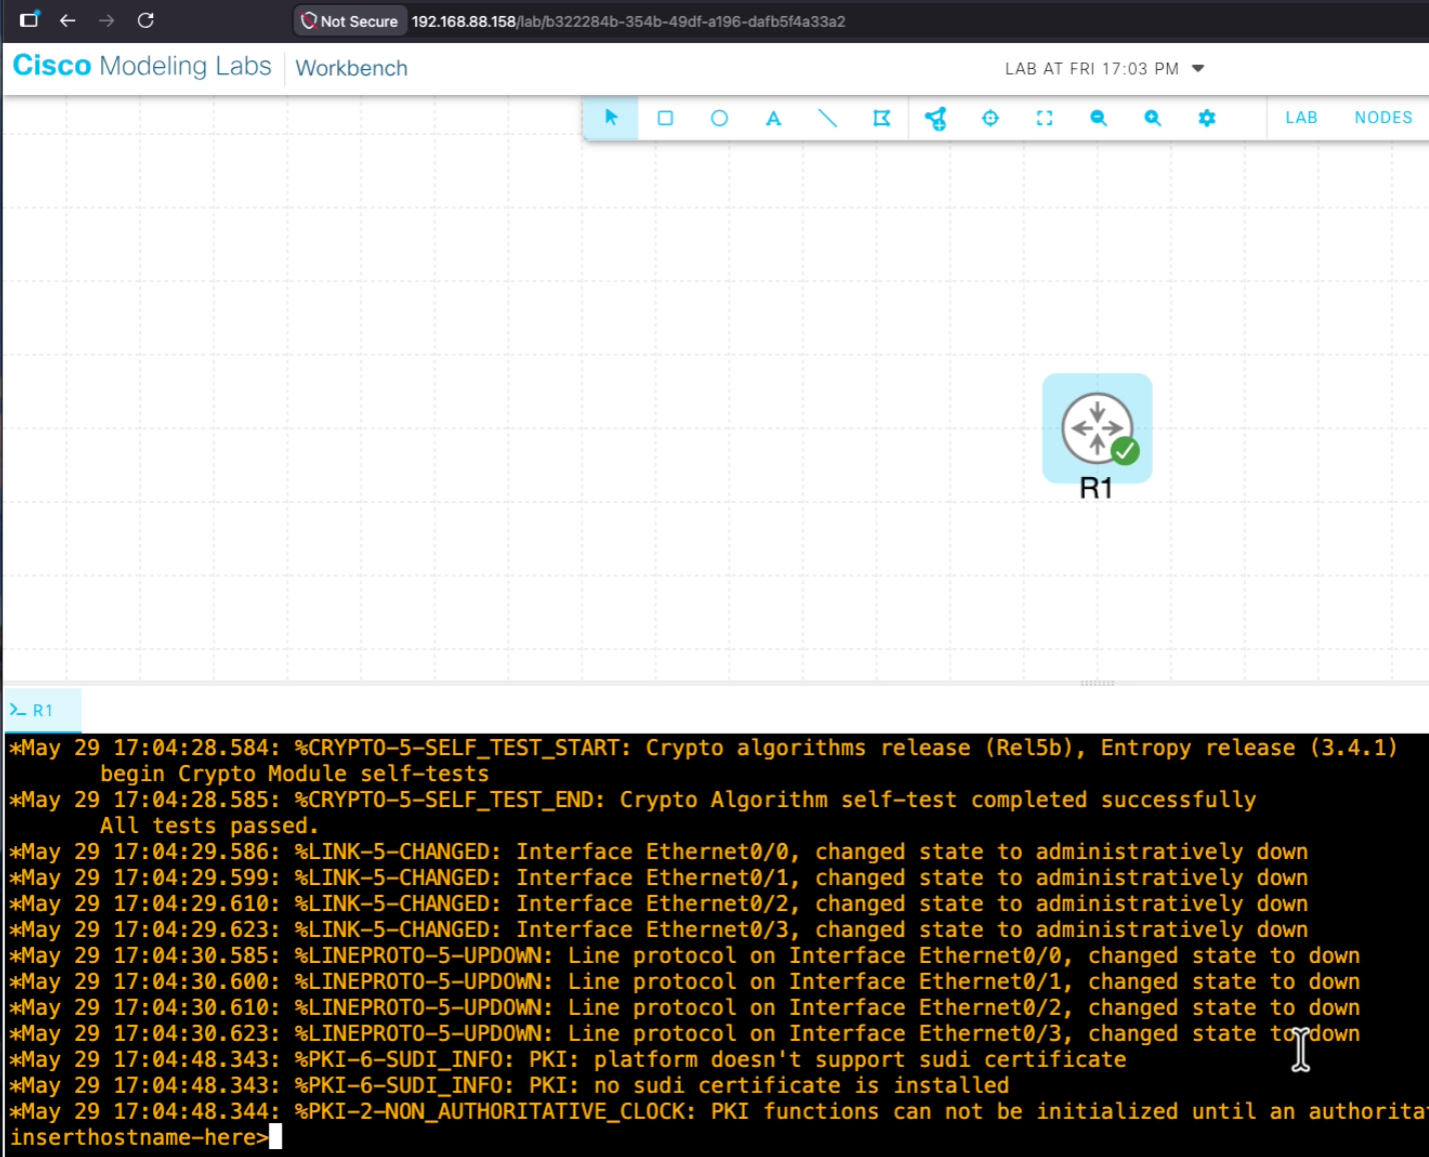
The first time you log in, CML will prompt you to register a license. Personal, Personal Plus, Enterprise, and Education licenses all use a registration token from your Cisco Smart Account; paste it in and the node limits unlock. After that, drop a node onto the canvas, start it, and open its console. If you see the node boot and hand you a prompt, your install is done and working.
Troubleshooting the common failures
Build your first lab
With CML up, the fastest way to get value is to build something you are studying. A two-router IOSv or IOL-XE topology is all you need to work through our OSPF, BGP, or EIGRP guides hands on. Drop in a couple of IOSvL2 or IOL-L2 switches and you can follow the VLAN and spanning tree walkthroughs. The asav-9-24-1 image pairs perfectly with our Cisco ASA cluster, and the wireless images line up with the Catalyst 9800 wireless material. Every show-command output you see in those articles was captured on CML labs exactly like the one you just built.
Frequently asked questions
Is Cisco Modeling Labs free?
There is a free tier, CML-Free, which runs a small number of nodes at no cost. The Personal and Personal Plus tiers (a modest annual fee) raise the node limit and are what most home labbers buy. Enterprise and Education are the larger, clustered offerings. Whichever you have, the install process on ESXi is identical; only the license token and node limits differ.
What is the difference between the OVA and the refplat ISO?
The OVA is the CML controller appliance, the thing you deploy as a VM. The refplat ISO carries the node images (routers, switches, firewalls) that your labs run. You install the OVA once and attach the ISO so CML can copy those images to its local disk. You can later download newer refplat ISOs to add updated node versions without reinstalling CML.
Do I really need ESXi 7.0 or later?
That is Cisco's supported minimum for CML 2.10, and it is what you should target. The OVA's virtual hardware version is 13 for backwards compatibility, but you should upgrade the VM's hardware compatibility to the newest version your host supports so you do not lose features. Older ESXi builds may appear to work but are not supported.
Why must I set the disk size before the first boot?
CML automatically resizes its filesystem to match the initial disk size the first time it boots. If you boot with the 32 GB default and grow the disk afterward, the extra space is not automatically used by the root filesystem; you have to add a storage volume or expand it manually from Cockpit. Sizing it to 100 GB or more before the first boot avoids that entirely.
Can I run CML on AMD or Apple Silicon?
CML is only fully supported on Intel processors. The application services run fine on AMD, but several reference platform images are Intel-only, so AMD support is best effort. Apple Silicon (M-series) is not supported for the VMware Fusion path. For a dependable lab, use an Intel host with VT-x and EPT.
Key takeaways
If you take one thing away from this guide, it is to configure the VM before you power it on: upgrade the hardware compatibility, give it real CPU and memory with high shares and reserved RAM, grow the disk to 100 GB or more, attach the refplat ISO, and set promiscuous mode plus forged transmits on the vSwitch. Get those right and the rest of the install is a ten-minute wizard followed by a license token. From there you have a full Cisco lab (IOS, IOS XE, NX-OS, IOS XR, ASA, and wireless) running on a single ESXi host, ready for whatever you are studying next.
This walkthrough was based on a real CML 2.10 install; for Cisco's authoritative reference, see the CML 2.10 Installation Guide and the Deploying the OVA on ESXi Server page.
Next in the lab-setup series: How to Install the Missing Docker Container Images in Cisco Modeling Labs 2.10.