Cisco IPv4 Configuration: Configure, Verify, and Troubleshoot IPv4
Learn Cisco IPv4 configuration step by step using real CLI commands. This beginner-friendly CCNA lab shows how to configure, verify, and troubleshoot IPv4 on Cisco routers.
IPv4 addressing enables devices to communicate in a network. Configuring IPv4 correctly on Cisco routers is a core skill you must master for both real networking environments and the CCNA exam.
This tutorial walks through configuring IPv4 on two Cisco routers, verifying interface status, testing connectivity, and troubleshooting common issues. The configuration and verification steps below were run using Cisco CML, but you can also use GNS3, Packet Tracer, or real hardware.
Topology
| Device | Interface | IP Address | Subnet Mask |
|---|---|---|---|
| R-1 | GigabitEthernet0/0 | 192.168.50.1 | 255.255.255.0 |
| R-2 | GigabitEthernet0/0 | 192.168.50.2 | 255.255.255.0 |
Step 1: Configure Router Hostnames
R-1
enable
configure terminal
hostname R-1
no ip domain-lookup
R-2
enable
configure terminal
hostname R-2
no ip domain-lookup
Step 2: Configure IPv4 Addresses on Interfaces
R-1
R-1(config)# interface gigabitEthernet0/0
R-1(config-if)# ip address 192.168.50.1 255.255.255.0   ! Assign IPv4 address
R-1(config-if)# no shutdown                             ! Enable interface
R-2
R-2(config)# interface gigabitEthernet0/0
R-2(config-if)# ip address 192.168.50.2 255.255.255.0   ! Assign IPv4 address
R-2(config-if)# no shutdown
Step 3: Verify Interface Status and IP Configuration
Use the following command to confirm interface status:
R-1
R-1# show ip interface brief
Interface              IP-Address        OK? Method Status            Protocol
GigabitEthernet0/0     192.168.50.1      YES manual up                up
R-2
R-2# show ip interface brief
Interface              IP-Address        OK? Method Status            Protocol
GigabitEthernet0/0     192.168.50.2      YES manual up                up
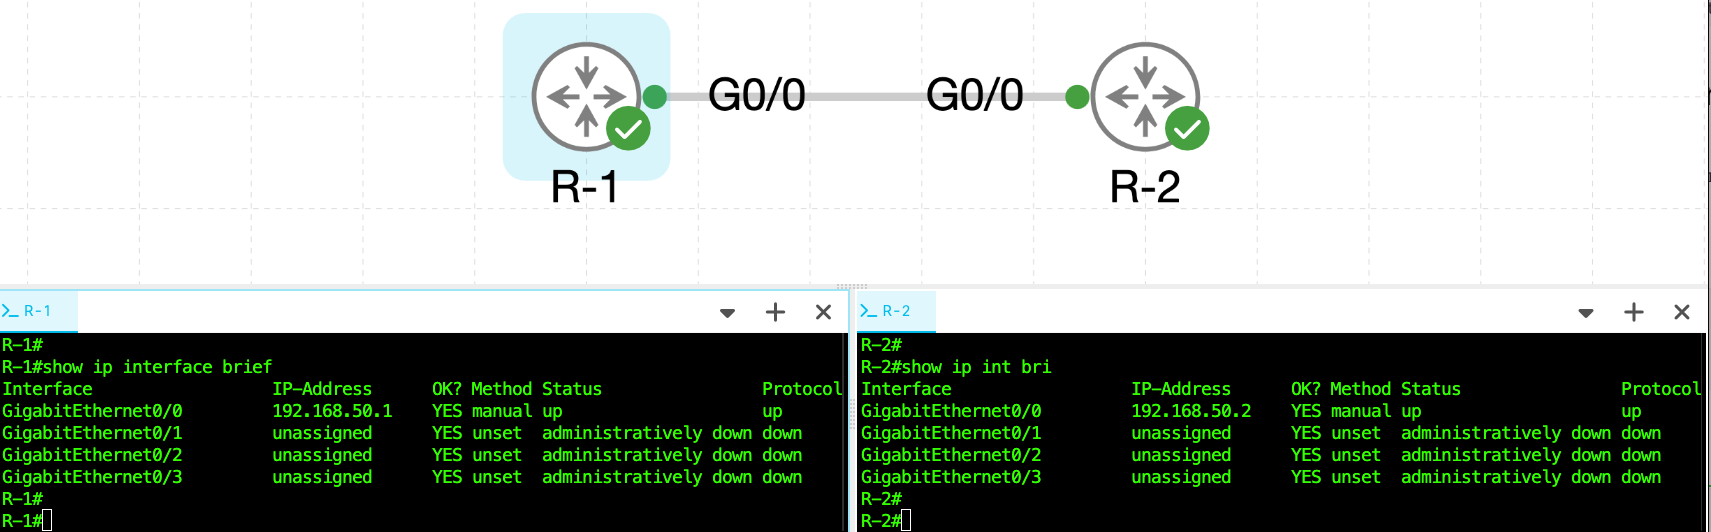
In the show ip interface brief screenshot. The Method column shows how the IP address was assigned to the interface, such as manually (configured by the user) or via DHCP. The Status column indicates the physical Layer 1 state of the interface, showing up if the interface is physically connected or administratively down if it has been disabled with the shutdown command. The Protocol column reflects the Layer 2 status, indicating whether the interface can send and receive data using its configured protocol. For full connectivity, both Status and Protocol should display up.Step 4: Test IPv4 Connectivity
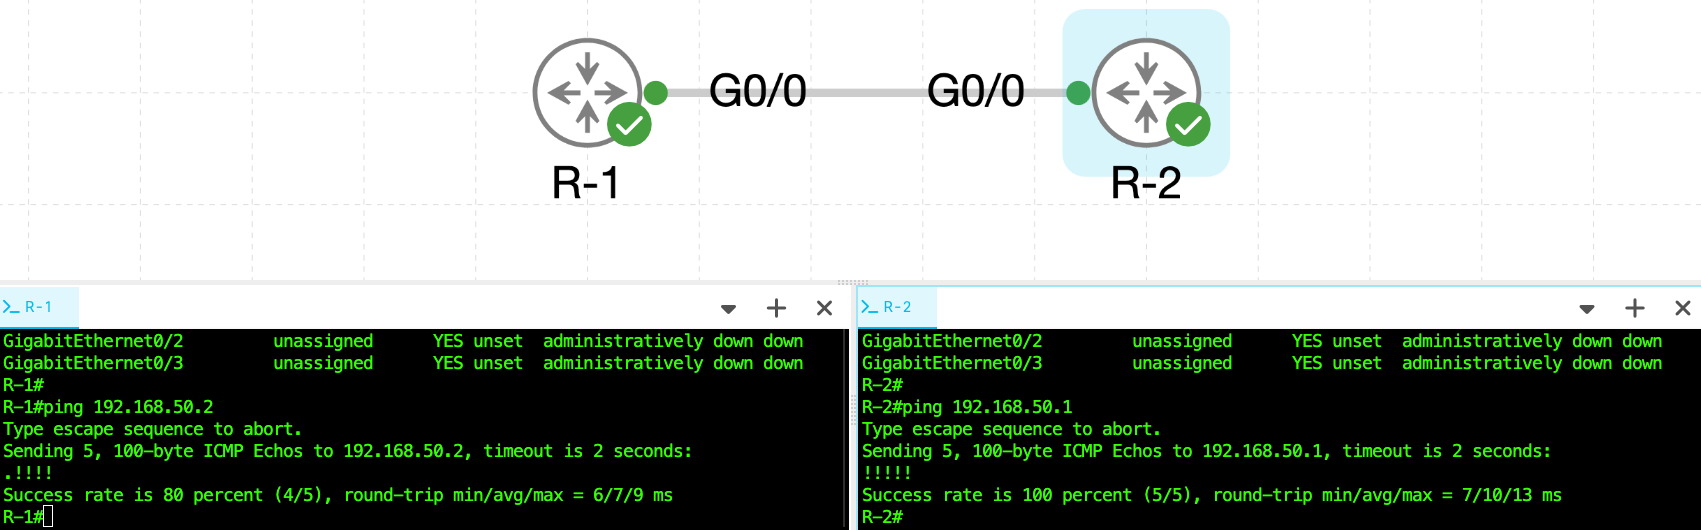
Ping from R-1 to R-2
R-1# ping 192.168.50.2
!!!!!
Ping from R-2 to R-1
R-2# ping 192.168.50.1
!!!!!
A successful ping confirms IPv4 connectivity between routers.
Step 5: View Routing Table
Routers automatically learn about directly connected networks.
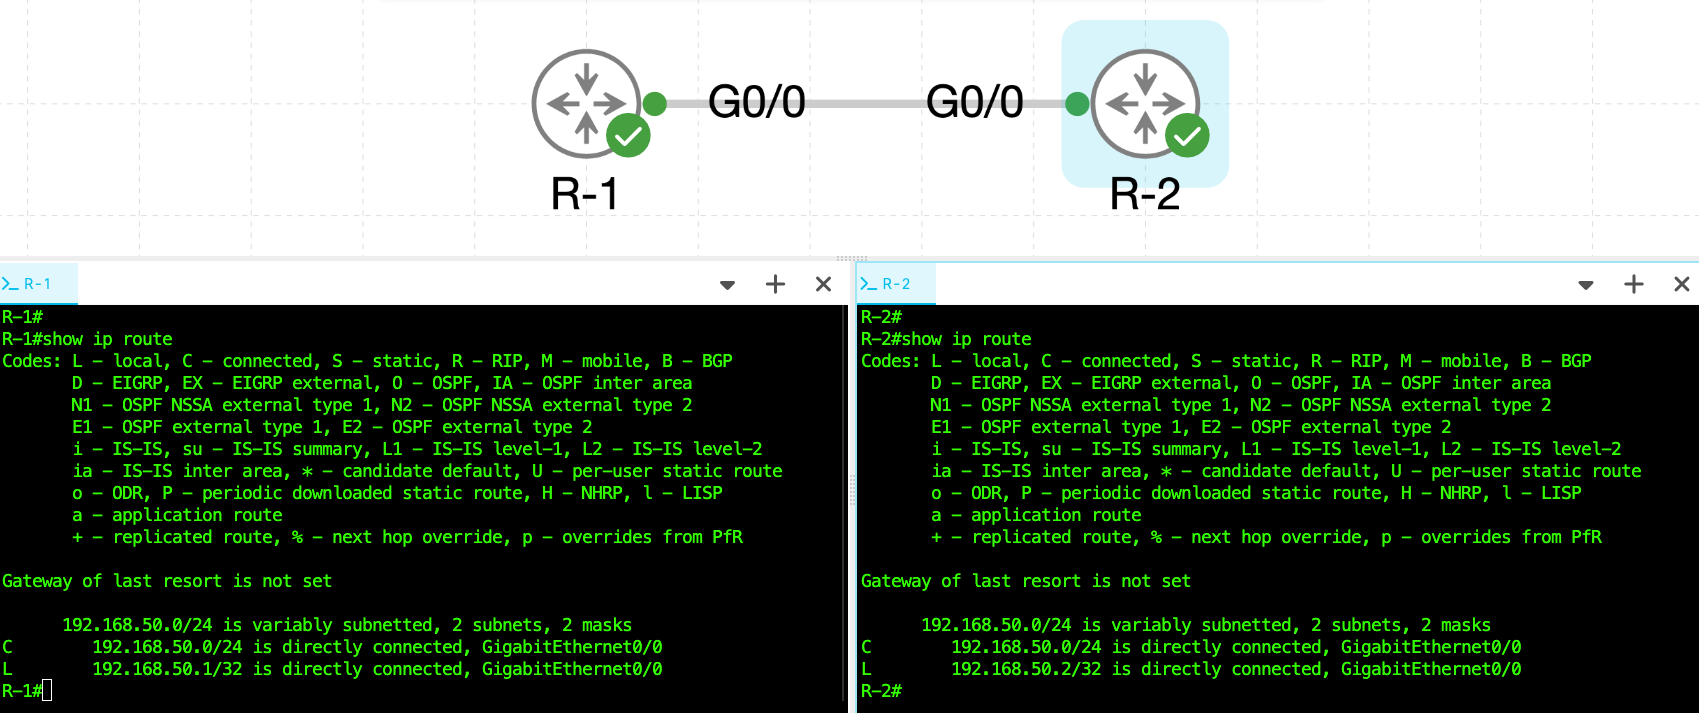
R-1# show ip route
C 192.168.50.0/24 is directly connected, GigabitEthernet0/0
L 192.168.50.1/32 is directly connected, GigabitEthernet0/0
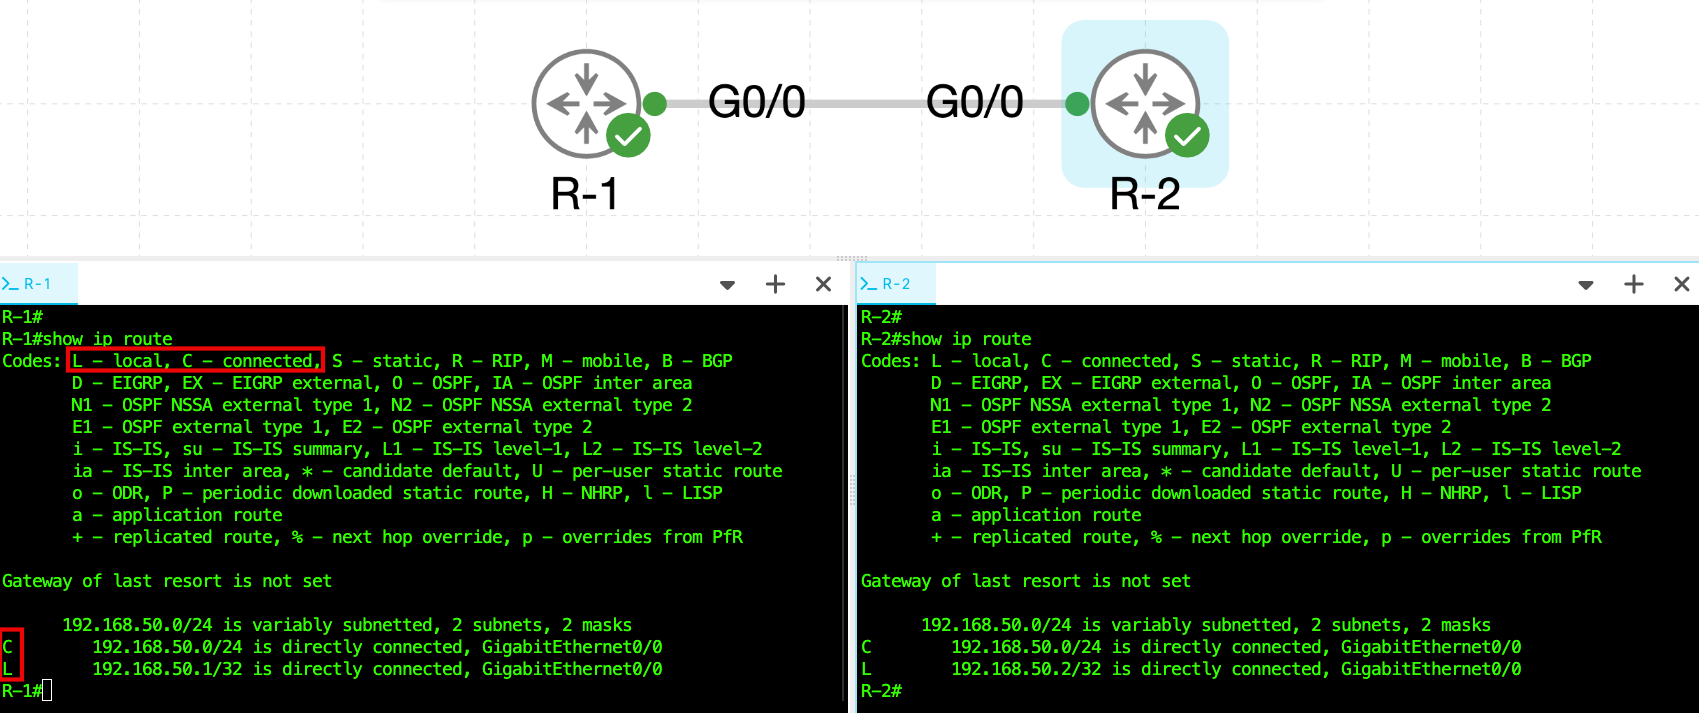
The screenshot above shows the output of the show ip route command from both R-1 and R-2. This command displays each router’s routing table, which tells the router where to forward IPv4 packets.
Both routing tables indicate that the IPv4 configuration is correct. The C code shows that the 192.168.50.0/24 network is directly connected through the GigabitEthernet0/0 interface, and the L entry represents the router’s local interface IP address. The message "Gateway of last resort is not set" simply means no default route has been configured yet, which is expected in this simple point-to-point lab.
This confirms that both routers have successfully learned the connected network and that IPv4 connectivity is operational.
Step 6: Troubleshoot Common IPv4 Issues
| Status | Meaning | Solution |
|---|---|---|
| administratively down, down | Interface shut down | Run no shutdown |
| up, down | Cable or link issue | Check physical connection |
| down, down | Interface disabled or no cable | Enable and connect link |
| up, up | Interface is working | No action required |
Example: Fix Interface Down Issue
R-2# show ip interface brief
GigabitEthernet0/0 192.168.50.2 administratively down down

R-2(config)# interface g0/0
R-2(config-if)# no shutdown
Common Troubleshooting Commands
| Command | Description |
|---|---|
| show ip interface brief | Check IPs and interface status |
| show ip route | View routing table |
| show running-config | Verify interface configuration |
| ping | Test IPv4 connectivity |
| traceroute | Trace network path |
FAQ
Why is my interface showing administratively down?
Because it has not been enabled yet. Go to interface config mode and use no shutdown.
Why are pings failing even with correct IPs?
Most common causes: wrong subnet, interface down, or no link connection.
Do I need a routing protocol for this lab?
No. Directly connected networks are added automatically.
Lab Recap
In this IPv4 configuration lab, you:
- Assigned IPv4 addresses to router interfaces
- Enabled and verified interface connectivity
- Tested connectivity using ping
- Analyzed routing tables
- Used basic troubleshooting commands
This foundational IPv4 setup is the first step in building more advanced labs, such as static routing, VLAN routing, or OSPF configuration.